If you’re pregnant and experiencing back and hip pain, practicing prenatal yoga poses can be a great way to alleviate discomfort and improve your overall wellbeing.
Pregnancy can be a beautiful experience but can also bring challenges. One of the most common issues my prenatal clients’ experience is back and hip pain. As the baby grows, the body experiences change in posture and weight distribution, which can cause discomfort and even pain. Fortunately, prenatal yoga poses can be an effective way to alleviate these symptoms and promote relaxation.
In this article, you’ll learn what causes hip and back pain during pregnancy and the best prenatal yoga exercises that you can do at home. Whether a beginner or an experienced yogi, these prenatal yoga poses are a great way to support your body during pregnancy and prepare for childbirth.
Table of Contents
Why do we have hip and back pain during pregnancy?
Hip and back pain during pregnancy are common issues that many expecting mothers experience. There are several reasons why pregnant women may experience these symptoms.
Significant Physical Changes
Firstly, the body undergoes significant changes during pregnancy. As your baby grows, your uterus expands to many times its normal size, and because it is centered in one area, this amount of growth affects the balance of your body and is the leading cause of back pain. As your belly grows, you lean back, which strains your spine. Also, due to this weight, your shoulders will begin to round forward, which causes additional strain on the back.

Relaxin
A big culprit for hip pain is the pregnancy hormone relaxin that, as the name suggests, relaxes the ligaments in the pelvis to help prepare for the baby’s delivery. However, this hormone can also affect other areas of the body, such as the hips and back, causing them to become more flexible and susceptible to injury.
Hip pain is usually caused by the loosening of the ligaments in the sacroiliac joint, which connects your spine to your pelvis. When the ligaments loosen, this results in pain and discomfort in the hips, lower back, and legs. Additionally, a change in gait as you move through trimesters (think waddle) can add extra stress to this joint.
Instant Relief
If you are experiencing hip pain caused by the sacroiliac (SI) joint during pregnancy, there are some things you can do to alleviate the pain and discomfort. Here are some tips for instant relief:
- Change Positions: Try changing positions frequently to relieve pressure on the joint and avoid sitting or standing for long periods. An excellent position to find relief is to sit in a chair on a pillow and to have a pillow behind your back. Another option is to lay on your side with a pillow or towel between your knees to take the pressure off your lower back and hips. If you have taken one of my prenatal yoga classes, it is how we take Savasana at the end 😊.
- Apply Heat: Apply a warm compress or take a warm bath to help relax the muscles around the joint. Alternatively, applying an ice pack to the area can help reduce inflammation and numb the pain.
- Massage: Massaging the muscles around the hip joint can help to relieve tension and reduce pain. You can gently massage the area with a foam roller or tennis ball.
- Wear Supportive Shoes: Wearing supportive shoes can help reduce the pressure on the joint, alleviating pain. Avoid high heels or shoes with minimal support.
*It is essential to consult with a healthcare provider or a certified prenatal yoga instructor if you are experiencing hip pain during pregnancy to determine the exact cause and receive appropriate treatment.
Best Prenatal Yoga Poses To Relieve Back & Hip Pain
While numerous yoga poses are great for pregnancy, below are my six personal favorite prenatal yoga poses for helping to alleviate back and hip pain. I advise holding each pose for one minute. These prenatal yoga poses are safe, gentle, and designed to help you stretch and strengthen your muscles while promoting relaxation and stress relief. As always, it’s essential to consult with your healthcare provider or a certified prenatal yoga instructor before beginning any new exercise routine.
As a Certified Pre/Post-Natal Yoga Instructor, and Certified Pre/Post-Natal Specialist, my experience these past 10 years has been both rewarding and fulfilling. Over the years, I have seen firsthand how the practice of yoga can benefit women during pregnancy and after childbirth. Sessions with me are designed to be safe and accessible, and perfectly catered to you. I always encourage my clients to listen to their bodies and practice at their own pace. I provide modifications for each pose to ensure that you can practice comfortably and safely. If you are interested in booking a session with me please click here.
Safe Prenatal Yoga Poses
Seated Side Bends: The seated side bend is a prenatal yoga pose that lengthens the abdominal muscles, hips, and thigh muscles, and improves flexibility in the spine.
Additionally, it expands the chest by stretching the pecs and intercostals (muscles between the ribs). It also stretches a muscle called your quadratus lumborum (QL) which attaches the lowest rib to the top of the pelvis and is located on both the left and right sides of the body. When the QL is short and tight, it becomes painful and can even spasm with lower back and sacroiliac injuries.
- Sit on the floor with your legs crossed in a comfortable position. If sitting on the floor is uncomfortable, you can sit on a folded blanket or cushion.
- Place your left hand on the floor next to your left hip and raise your right arm up overhead.
- As you inhale, lengthen your spine and reach your right arm up and over to the left side, stretching through the right side of your body.
- Hold the stretch for a few breaths, feeling the stretch along your right side from your hip to your fingertips.
- Exhale and release the stretch, coming back to a neutral seated position.
- Repeat on the other side, placing your right hand on the floor next to your right hip and raising your left arm up overhead.
- Inhale and lengthen your spine, reaching your left arm up and over to the right side.
- Hold the stretch for a few breaths, feeling the stretch along your left side from your hip to your fingertips.
- Exhale and release the stretch, coming back to a neutral seated position.
Some tips to keep in mind while doing Seated Side Bends:
- Keep your shoulders relaxed and your neck in line with your spine.
- Avoid collapsing your chest or hunching your shoulders.
- If you feel any discomfort or pain, come out of the pose slowly and adjust your position.
Cat/Cow: This prenatal yoga pose involves a gentle flowing movement between two positions (flexion and extension of the spine). It will decrease hip and lower back pain, increase spinal mobility, and help with round ligament pain, as well as strengthen the spine, hips, and shoulders.
- Start on your hands and knees in a tabletop position, with your wrists directly under your shoulders and your knees under your hips.
- As you inhale, slowly lift your head and tailbone towards the ceiling, arching your spine and opening your chest. This is the Cow pose.
- As you exhale, slowly tuck your chin to your chest and round your spine, bringing your tailbone towards your knees. This is the Cat pose.
- Continue to flow between the two poses, inhaling to come into Cow pose and exhaling to move into Cat pose.
- Repeat this movement for several breaths, moving slowly and mindfully.
Some tips to keep in mind while doing Cat/Cow:
- Keep your movements slow and controlled, and move with your breath.
- Keep your wrists directly under your shoulders and your knees under your hips throughout the pose.
- Focus on the stretch in your spine and hips, and avoid collapsing your shoulders or neck.
- If you feel any discomfort or pain, come out of the pose slowly and adjust your position.
Ardha Kapotasana (Half Pigeon): This prenatal yoga pose improves flexibility and mobility in the hips and stretches the thighs, glutes, and external hip rotators, specifically the piriformis muscle. The piriformis muscle is a small, pear-shaped muscle located in the glutes, running from the base of the spine to the top of the femur (thigh bone).
The piriformis is one of the deep muscles in the hip region and is responsible for stabilizing the hip joint and rotating the leg outward. This can often cause back and leg pain (sciatica) because the sciatic nerve, the largest nerve in the body, runs directly beneath it. In pregnancy, it is common for the piriformis, which puts pressure on the sciatic nerve and can cause pain, tingling, or numbness in the glutes and down the leg.
- Begin in a tabletop position with your hands and knees on the ground (for my pilates people yoga tabletop means all 4’s 😉 ), aligning your wrists beneath your shoulders and your knees beneath your hips.
- Slide your right knee forward towards your right wrist. Your right ankle should be in front of your left hip.
- Slowly lower your right hip towards the ground, keeping your left leg extended straight behind you.
- Square your hips towards the ground, making sure your left hip doesn’t lift up.
- Walk your hands forward, lowering your torso towards the ground. You can rest your forehead on the floor or on a block for support.
- Breathe deeply and hold the pose for 30 seconds to 1 minute.
- To release the pose, walk your hands back towards your body, tuck your back toes under, and lift your hips up to come back to tabletop position.
- Repeat the pose on the other side, bringing your left knee forward.
Some tips to keep in mind while doing Ardha Kapotasana:
- Keep your front foot flexed to protect your knee.
- If you feel any discomfort or pain in your knee, place a blanket or cushion under your hip for support.
- You can use a block or blanket to support your forehead if it doesn’t reach the ground comfortably.
- Avoid collapsing your shoulders or neck.
- Lastly, you can also do this pose in a chair. Sit on a chair with your feet flat on the ground. Cross one foot over the other knee in the shape of the number “4.” As you exhale, slowly lean forward keeping a flat back until you feel a stretch in your lower back and glutes. Think about elongating your spine rather than curling your shoulders in toward your lap. Repeat on other side.
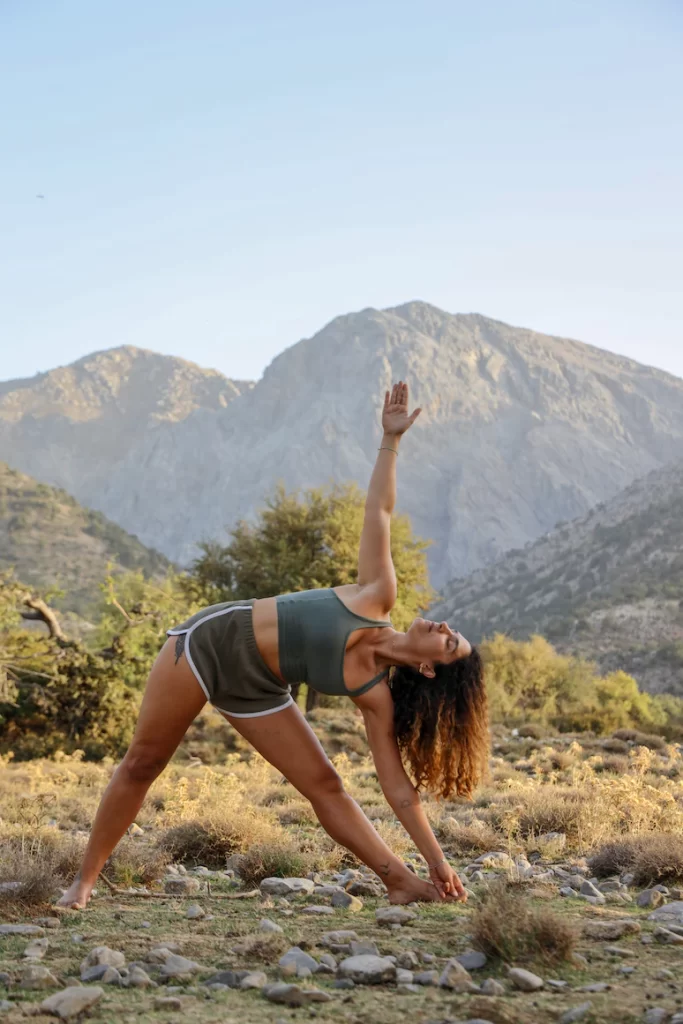
Trikonasana (Triangle Pose): Triangle pose is a prenatal yoga pose that strengthens the back and spine, opens the chest and shoulders, and stretches the hips/hamstrings and pelvic area.
- Start in a standing position with your feet about 3-4 feet apart. Turn your right foot out 90 degrees and your left foot in slightly.
- Stretch your arms out to the sides, parallel to the floor, with your palms facing down.
- Inhale and reach your right arm towards the ceiling, keeping your left arm extended towards the floor.
- As you exhale, tilt your torso to the right, bending at the hip, and lower your right hand to rest on your right leg, ankle, or the floor, depending on your flexibility.
- Reach your left arm up towards the ceiling, creating a straight line from your left foot to your left fingertips.
- Keep your hips facing forward and stack your shoulders on top of each other.
- Look up towards your left hand, or straight ahead if it feels better for your neck.
- Hold the pose for 5-10 breaths, then inhale and slowly come back up to standing. Repeat on the other side.
Some tips to keep in mind while doing Triangle pose:
- Keep your legs straight and strong, engaging your quadriceps and glutes.
- Focus on lengthening through your spine and reaching out through your fingertips.
- Avoid collapsing your shoulders or leaning too far forward.
- If you have neck pain, keep your gaze forward instead of looking up.
- If you experience difficulty balancing or too much strain in the lumbar spine take a chair in front of you, seat facing you. Practice the pose as described above, only instead of bringing your front hand onto your shin or a block, place it onto the seat of the chair.
Malasana (Yoga Squat): Malasana is a prenatal yoga pose that helps to open your hips, lengthen and stretch your pelvic floor and inner thighs. It also is a great pose to aid in ankle flexibility.
- Start by standing with your feet about hip-width apart.
- Slowly bend your knees and lower your hips towards the floor, keeping your heels on the ground.
- Bring your palms together in front of your chest and press your elbows into your inner thighs.
- Use your elbows to gently push your knees wider apart, creating a stretch in your inner thighs.
- Keep your spine straight and lengthen through the crown of your head.
Some tips to keep in mind while doing Malasana:
- If you have trouble keeping your heels on the ground, place a folded blanket or yoga block under your heels for support.
- If you feel any discomfort in your knees, adjust your position so that your knees are tracking in the same direction as your toes.
- Keep your spine long and avoid rounding or collapsing in the upper back.
- If this feels uncomfortable for you or causes too much pressure in the hips, inner thighs or ankles try a variation where you are supported by an object under your glutes, like a yoga block or small stool. If you have pain in the knees keep your feet parallel.
Prasarita Padottanasana (Wide-Legged Forward Bend): Prasarita Padottanasana is a prenatal yoga pose that increases the flexibility and mobility of the hamstrings and quadriceps without straining your back.
- Start in a standing position with your feet wider than hip-width apart.
- Turn your toes slightly inward and your heels slightly outward.
- Bring your hands to your hips and exhale as you hinge forward at the hips, keeping your back straight.
- Place your hands on the floor in front of you, between your feet, with your fingers pointing forward.
- If you’re able to, bring your palms flat to the floor.
- If you feel comfortable, you can bring your head towards the floor, but don’t force it. Keep your neck relaxed and your gaze towards your feet.
- Hold the pose for 5-10 deep breaths, then slowly come back up to standing.
Some tips to keep in mind while doing Prasarita Padottanasana:
- If you have tight hamstrings, you may not be able to bring your hands all the way to the floor. In this case, you can place your hands on blocks or a chair for support.
- Keep your weight evenly distributed between both feet and avoid leaning too far forward or back.
- Keep your knees slightly bent if you have any discomfort in your lower back or hips.
- If you want to increase the hamstring stretch, walk your hands from side to side.
Takeaway
Incorporating prenatal yoga exercises into your daily routine can be incredibly beneficial for expecting mothers who are experiencing back and hip pain. Not only can these exercises help alleviate discomfort, but they can also promote relaxation and stress relief. Remember to listen to your body and adjust the poses as needed to ensure that you are practicing safely and comfortably.
With regular practice, you may find that prenatal yoga becomes an essential part of your pregnancy journey, helping you to stay comfortable, calm, and connected to your body as you prepare for the arrival of your little one.
Thank you for being here with me. E
What poses to avoid in prenatal yoga?
During prenatal yoga, it is important to be mindful of certain poses and make appropriate modifications to ensure the safety and comfort of both the pregnant person and the baby. Deep twists that involve compressing the abdomen should generally be avoided to prevent restricting blood flow to the uterus. Instead, opting for gentle twists that do not exert excessive pressure on the belly is recommended. Additionally, after the first trimester, it is advised to avoid poses that involve lying flat on the back. This position can potentially compress the vena cava, a major blood vessel, and reduce blood flow to the uterus and the baby. Modifying supine poses by propping the upper body with blankets or using an incline can help alleviate this issue.
When should I start prenatal yoga?
It is generally recommended to start prenatal yoga as soon as you feel comfortable and have received clearance from your healthcare provider. Many women begin prenatal yoga during the first trimester, but it is never too late to start. The earlier you start, the more time you have to familiarize yourself with the poses, breathing techniques, and modifications that are specifically designed to support your changing body during pregnancy.
*All images courtesy of Upsplash.